Drawing Roses that look great isn't difficult, but it will take a little attention to detail. Apart from that it's as simple as putting your pencil to the page. Let's get into this drawing of a rose flower. Don't forget to check out the video at the bottom of the page!
Step 1:
If you draw from life, or draw from a photo, I suggest starting the same way - outline the major shapes of the rose. When I say 'the major shapes' I mean the petals, stem and bud of the rose. I sometimes also outline the areas of most shadow as well, but remember to draw lightly at all times so you can erase your lines at the end. This step should be fairly quick to complete - you don't want to spend a long time getting your basic lines down, as they are just guide lines so no need to worry if they are not perfect.
Step 2:
Begin to darken some of the lines that make up the major shapes of the rose. If you are not sure which lines to darken, you can start with the outline. Drawing roses that look realistic will require some shading, so start to add that in now. You can see that my shading lines are a little messy, but no need to worry - at this stage those scribbled looking shadows will get more attention in the following steps.
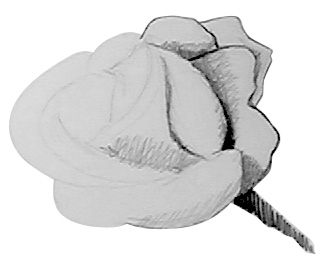
Step 3:
Our Drawing Roses lesson is almost complete. In this step, continue on with darkening your lines, and adding in shading. Notice how the rose petals have a lot more detail in this step than they did previously. As you are adding in the darkened lines to your drawing of a rose flower remember that you can add in additional details that you did note make in your original quick sketch.
Step 4:
In this last step of drawing roses what you need to do is finish shading your drawing, and go over your major shape lines one more time. Also add in any additional lines - in my drawing I added in another part of the stem. Notice that the shading on the stem is also a lot darker than in previous images.
Here's the video part of this tutorial. I hope that from the text above that you're able to see the actual process that I went through to create the roses above - Enjoy!
If you like drawing roses but you're a little stuck on where you can find some great pictures to draw from I suggest clicking here for find more great nature and flower pictures and checking out the rose page. Sally, the owner of the site, is more than happy to let you use her beautiful pictures for your own works of art. Sweet!
Are you looking to make a breakthrough with your artistic abilities?
Artists from the world's top studios like Disney, Nickelodeon, Blue Sky, and Pixar are sharing their hard-earned knowledge so you can learn directly from the people who create the amazing comics, movies and cartoons that we all watch and love.
If you're tired of looking for a good teacher - stop looking right now and click this link.
 Step 2:
 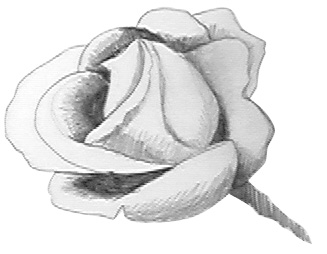 Step 3:
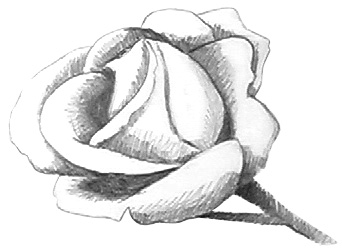 Step 4: