Drawing a Bright and
Happy Cartoon Sun

Drawing a cartoon sun is one of the easiest things to draw. At least, that's what I imagine you must be thinking. When you look up into the sky at the real sun (don't look at it too long) it's not much more than a big ball of blinding light. So to draw a cartoon version of the sun you would expect it to also be something simple, something bright and you're totally right. Anyone can draw a circle though, so you will learn how to draw curves and make this sun shine brightly.
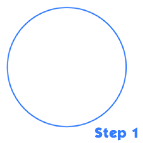
Step 1 - A Big Ball of Light
Grab a compass from your geometry drawing kit, a cup, a cd, a coin, a bowl - any circular drawing object that you can find. You'll start this cartoon sun drawing lesson off by making a circle. Use whatever object you found and trace it. It's important that your circle be nearly perfect because we will use a compass later to help make the spikes coming out from the sun's face.

Step 2 - Detailing the Face
This is another easy step. The mouth is a simple curve with two curves on the end of it. The eyes and eyebrows are also curves. Notice that the mouth is drawn at a slight angle. This helps make the face a little more interesting than if everything was symmetrical from the left side to the right. Feel free to experiment at this step and make a face that you feel shows the personality of your cartoon sun.
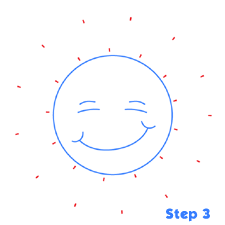
Step 3 - Guide Points
Get out your compass and set it up so that you will draw a larger circle - in the step 3 picture this is the outer layer of red dots. Instead of drawing a full circle you only want to place some small dots along the path of your compass circle. These will be guides that we will use in the next step.
Try use an equal distance between the points. After you have done that, make your compass smaller and create another layer of dots that is closer to the cartoon sun face. These marks should not touch the face and be spaced so that you add a dot between each of the marks on the larger guide line. These marks will be used to define the low point of the curves in the next step. If you are confused take a look at the step 4 image and see how these marks will be used.
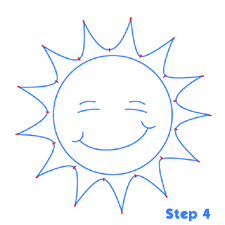
Step 4 - Adding Curves
Using your guide lines from step 3 it's time to add some curves to the cartoon sun and start to let it shine. Start at one of the outer layer of dots and draw a curve from outer point, down to inner point and then back up to an outer point. If you placed
the points correctly in step 3 this should be easy. Continue around the entire sun and You will have the first layer of shiny curves. The cartoon sun should really start to take shape now.

Step 5 - Another Row of Curves
This is an optional step, so if you are happy with your drawing after step 4 you can consider it done. Follow steps 3 and 4 again, but this time when you make your inner and outer guide dots make your compass slightly larger than before. Also, adjust the position of the dots so that this second layer's curves will be drawing in the middle of the first layer of shiny details. Take care to draw lightly and make sure not to draw over top of your work from step 4. This row of curves should looks like it is behind the first row.
That's it - quick and painless cartoon sun drawing! The take away lesson here is that when you want to draw curves it's good to set yourself up with guide points. Draw your guides first, and then draw your curve and make it pass through the guide points. This is the best way to draw curves that look great.
|
