How to Draw a Simple and Stylish
Cartoon Chicken
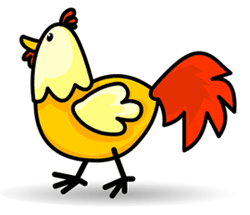
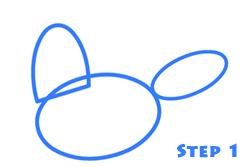
This cartoon chicken may look easy to draw, but there are a few little tricky parts that you are going to have to look out for while you are drawing. To start things off we'll create 3 different shapes. The two ovals will make the main body and the tail. The upside down cup shape will make the head of the chicken. Remember to hold your pencil lightly as you draw so that if you make some mistakes they will erase easily.
Try and get the shapes similar to the example image to the left to make sure that you are starting off on the right foot.
Step 2 - Detailing the Head
Add another circle inside of the main body cirlce. This will be the start of the body of the cartoon chicken. At the bottom of the head make three bumps at the base of the neck where it attaches to the body.
Add a little curve to make the beak and add a small simple dot for the eye.
 Step 3 - Lots of Little Details Step 3 - Lots of Little Details
This step might look a little scary, but follow along here and we'll get through adding all of these details. First for the head add a few little curves to the top of the chicken's head. Then add two small circles under the chicken's beak. You might notice that in this step a small part of the eye was erased to show a shiny part of the eye.
Adding this detail is optional, but it's one of those things that really helps make your drawing look great.
Add lines for the feet. Notice that these lines are a little thicker than the other lines of the body. This is a style choice. It's up to you if you would like to make the legs thicker or not.
The last part of this step is to add some spiky details to the bottom side of the tail. Follow the example image and try to match it as close as possible. Remember to draw lightly because this part of the cartoon chicken will get changed in the next step.
Ready to move on?
 Step 4 - Finishing Up Step 4 - Finishing Up
First connect the two circles that you drew underneath the beak into one shape. Next, add three bumps to the back of the wing to give it a more interesting shape than the simple circle we had in the last step.
Now remember in last step when you drew the spikes on the bottom of the tail? Well, I hope you took the advice to draw lightly, because those straight lines were 'guide lines' that we can use to draw curved lines over top.
|